
 |
| the pop couture |
Over the last little while I've been seeing spots, actually pompoms, everywhere! I especially love the above chandelier. There are soo many great ideas that people have come up with on how to use theses fuzzy gems. I've made pompoms for Norm & Meeka for a while, because Meeka, the kitten, loves to play fetch with them. Yes she fetches & she's good at it! With all the great ideas out there, now I feel compelled to give pompoms a new use! After some inspirational ideas, I'll show you how to easily make your own pompoms.
 |
| simple.bliss |
 |
| hedgehogs |
 |
| WhipUp |
 |
| Country Living |
 |
| Wear is Ivy? |
 |
| Lion Brand Pom Pom Rug Tutorial |
 |
| Junk Mail Gems |
To make ANY of these projects you need to know how to make a pompom, it's super easy & fast! This is the method I used for making cat toys too:
Materials:
- card board box
- scissors
- left over yarn
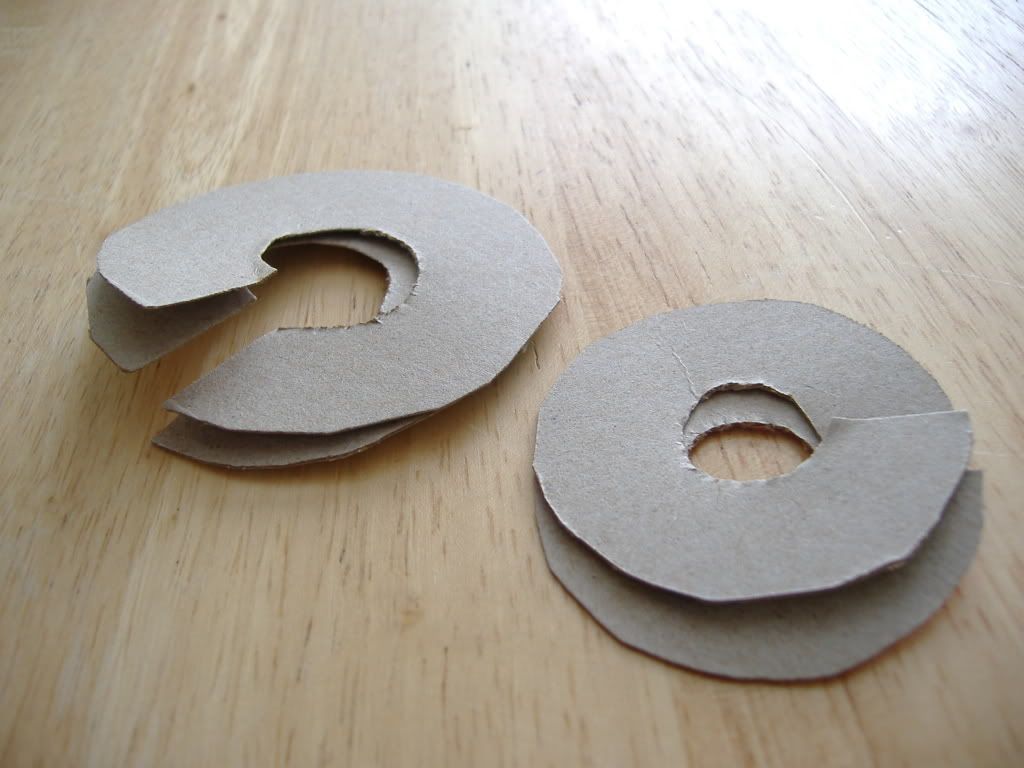
1. cut out 2 cardboard donuts of the same size. I made a couple different sizes of donuts for different sized pompoms.
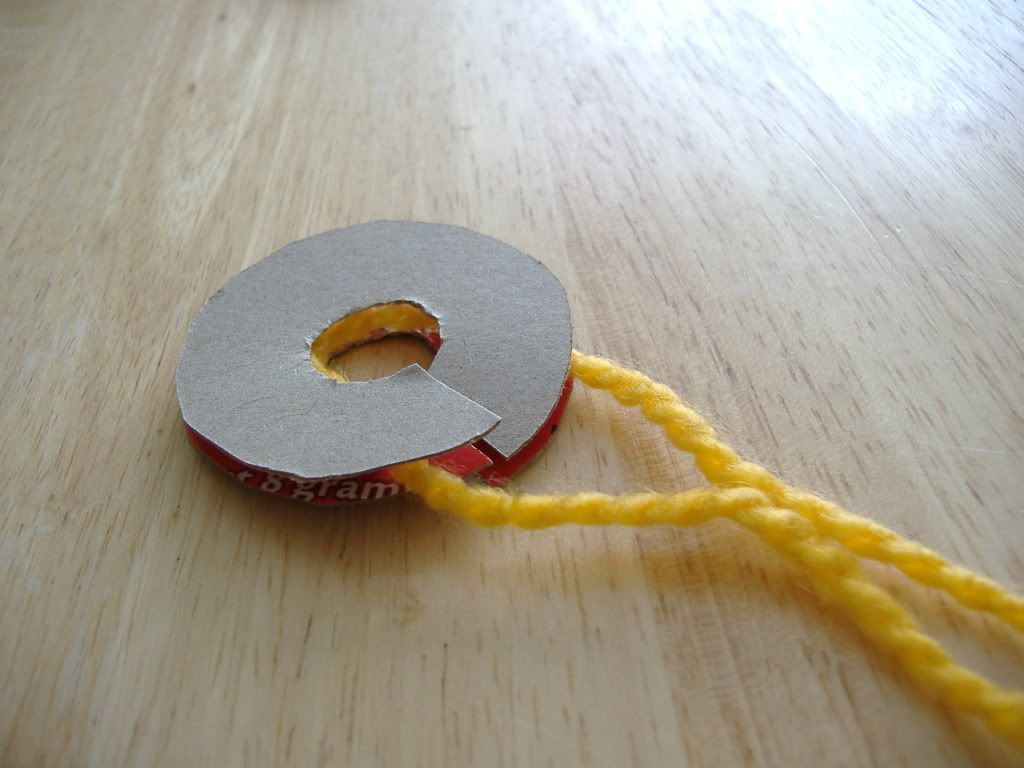
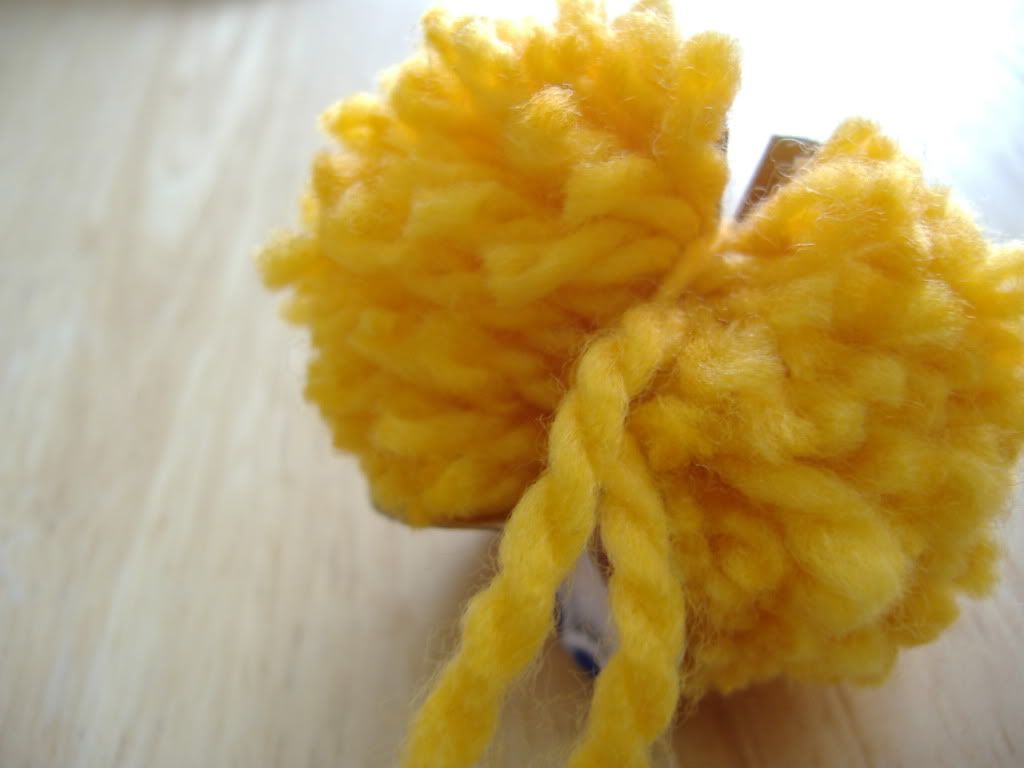
2. cut small length of yarn & sandwich it between the 2 donuts (this will be used secure your pompom later.)
3. start winding your left over yarn around & around both donuts. I cut a slit in the donuts so that donut was movable & winding was easy, but you could also use a large needle to weave the yarn around the donut, it's up to you. *make sure NOT to get the loose ends of the sandwiched yarn tangled*
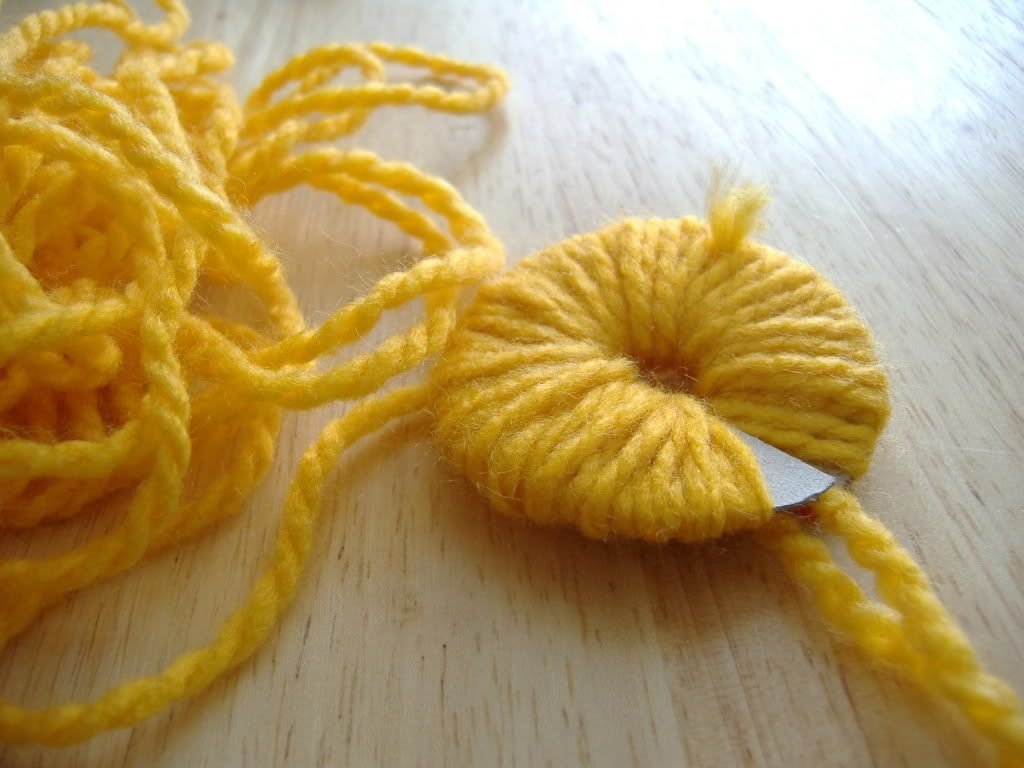
4. keep winding until you can't fit anymore yarn into the center whole.
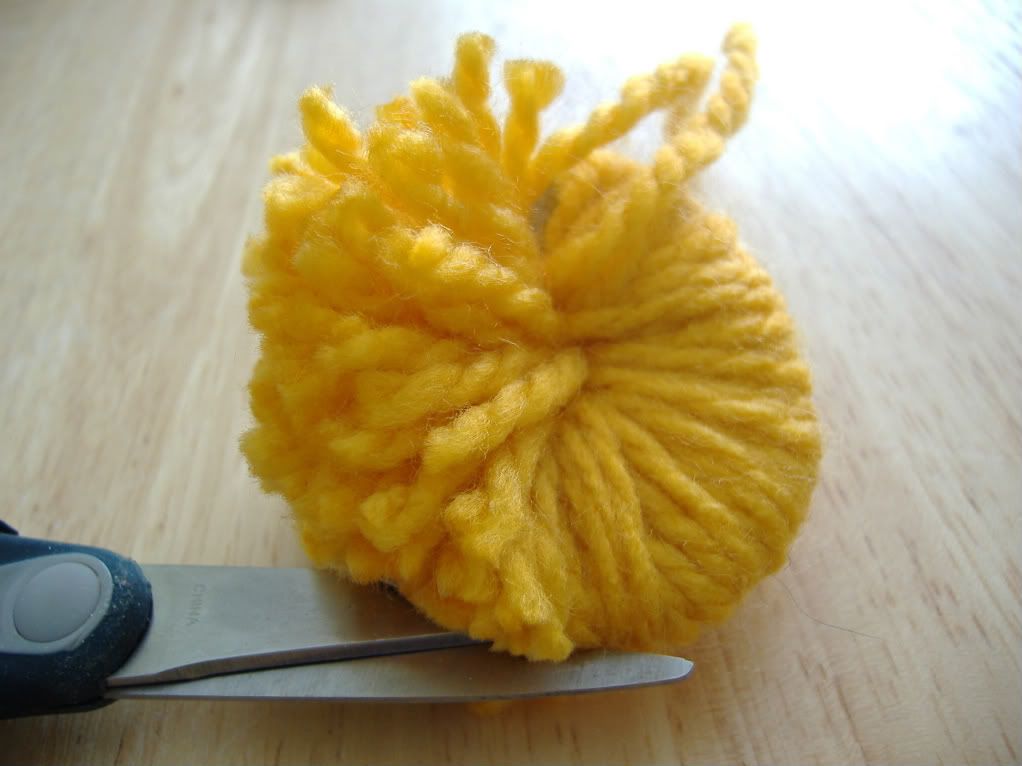
5. loosely tie the ends of that sandwiched yarn from before. Use the scissors to cut the yarn along the outer edge of the donut. It's easiest if you position the scissors between the 2 pieces of cardboard.
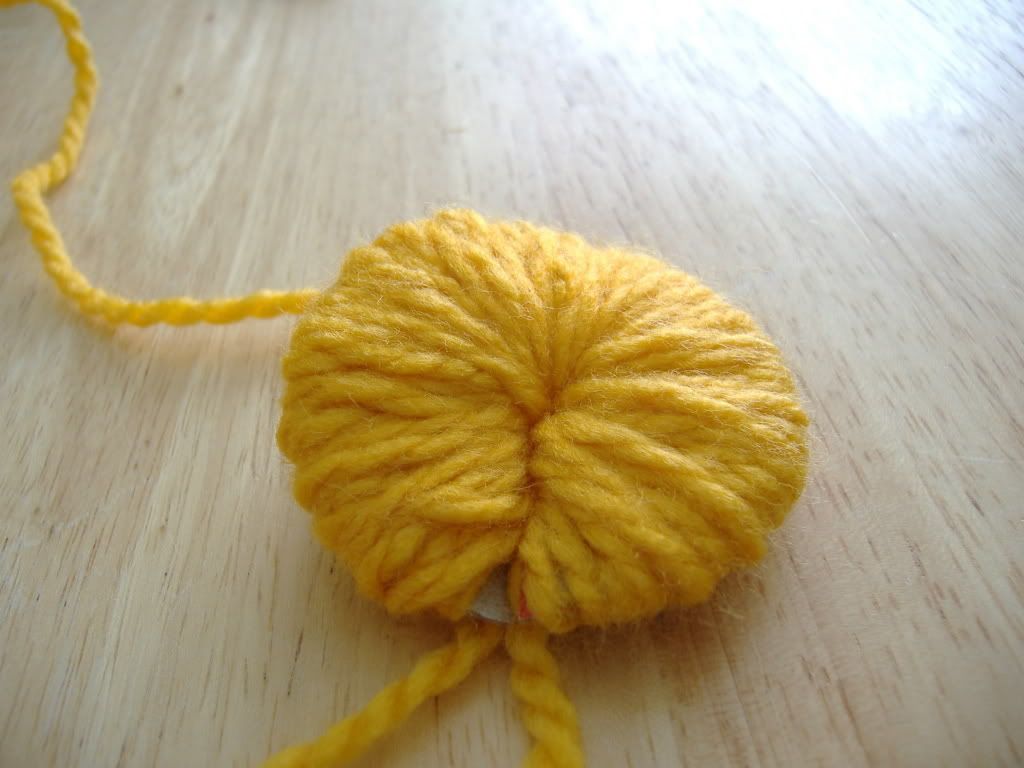
7. tightly tie the long loose ends of yarn to secure the pompom & pull the cardboard pieces off.

8. trim up the pompom to the shape & size you desire, then you're done!
Now you can do what every you want with them! If you keep the sandwiched yarn (in step 2) a longer you can use it to tie the pompoms together to make a pompom garland or the chandelier. You can also grab some sticks or wooden kitchen skewers & hot glue the pompoms to the ends to make pompom blooms. That was my plan, but we got a ton of snow AGAIN & the sticks I had my eye on outside are now covered so I'll have to wait to make my winter wool blooms later. I kind of have my eye on making that chandelier too...but I'll have to sell it to the bf first.

I think the pom pom blooms are my favorite !! They look soo pretty in the vases, what a neat idea :) I think I could try that, need to go the dollar store or second hand shop and look for some vases !! Thanks for the great idea :)
ReplyDeleteLast night I fell hopelessly in love with the pom pom rug and convinced hubby that I would REALLY commit to this project this time, and really NOT do it for half an hour and then get bored and denounce the craft leaving a trail of destruction in my wake...
ReplyDeleteTwo hours later, with 4 mini poms and a couple of monsters I made my denouncement. We figured out that it would take us at the very least until Christmas to create a lovely pom pom rug and given the time involved I had even managed to convince him that the 300 quid rug I had found online was reasonable price.... then I found this:
http://www.youtube.com/watch?v=_GiiInfIz30.
So easy to make, I chopped up a couple of wooden spoons and found some 2x4... and the rug's now back on! Wish me luck!!!